How to make Soratama by yourself
For those of you who want to make Soratama using less money as possible, here are some tips to handmade Soratama. It could be made with an acrylic board and a clear bulb. If it is difficult to make this part on your own, “Soratama for DIY” kit is available on Amazon.→Amazon.co.jp
This kit uses acrylic materials and is a simplified product. If you would like a clear and sharp image, we recommend using “Soratama Lensball Filter” which is made out of optical glass.
●What you need
-Camera and lens for macro photography
-Close-up lens or the macro extension tube, if your camera is not suitable for macro photography
-Paper tube or cardboard tube such as an empty snack container and lens hood
-Soratama
-Step-up ring
●Procedures
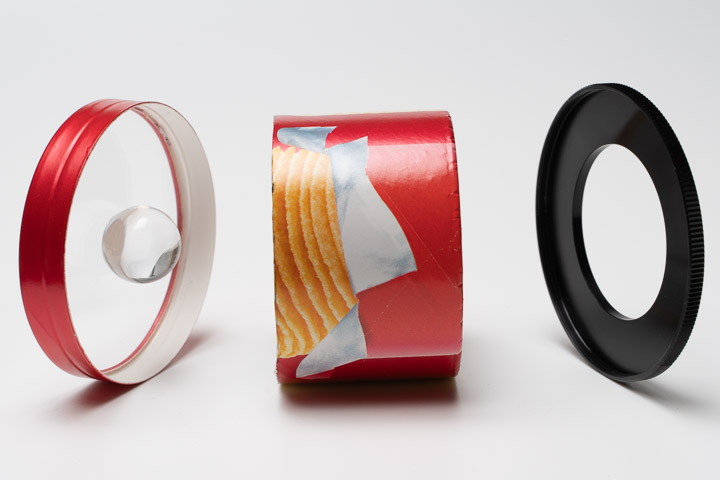
1)Cut out the flat lid from the rim. Use a cutter to cut the edge.
2)Make it suitable for macro photography. →How to set Close-up mode
3)Adjust length of the lens tube. When the focal distance is short, make the lens tube short. When the focal distance is long, make the lens tube long.→Preferable Lenses
Use manual focus to focus on the nearest object and check the length of the lens tube. For further details, please see the following link. →Length of the Soratama Extension Tube
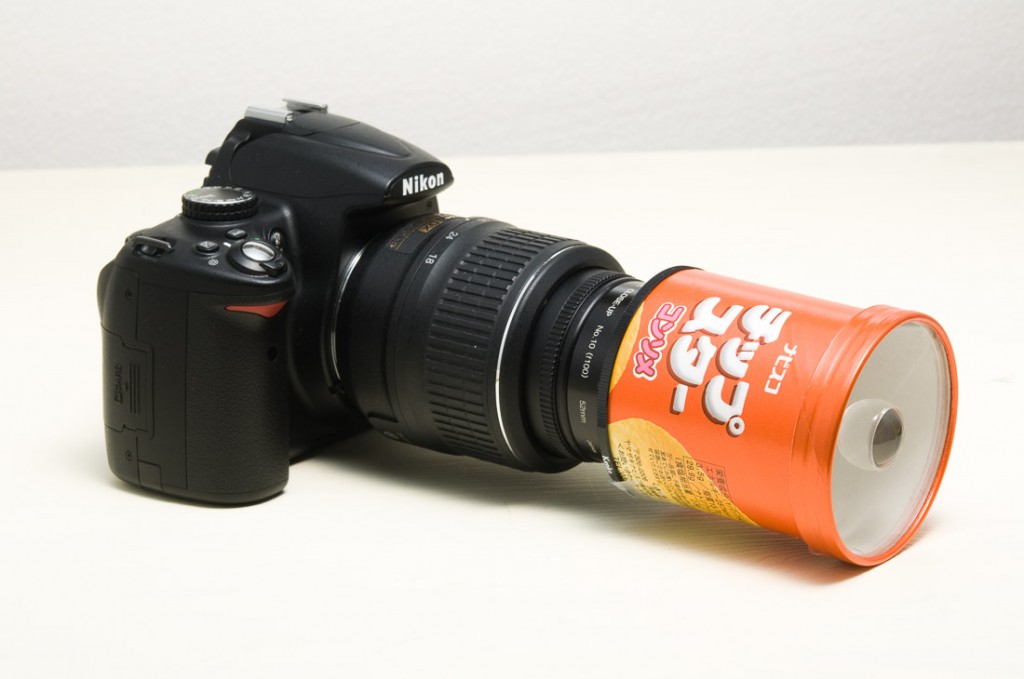
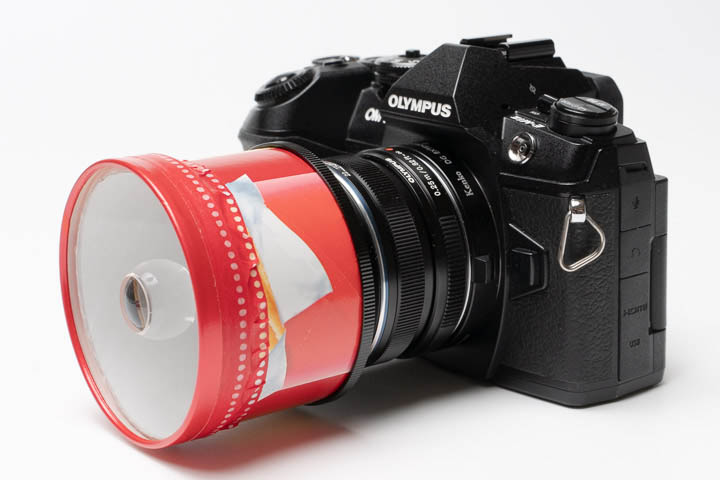
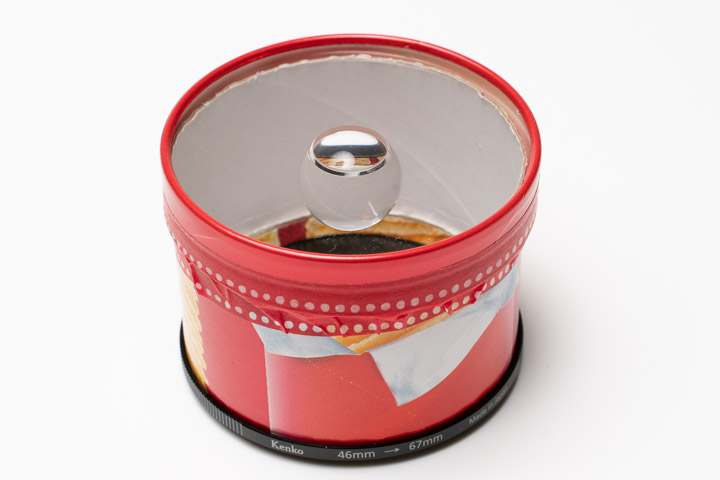
4)Cut the empty snack container. In order to draw a cutting line, wrap the container with a paper. Use a cutter to cut along the line. Do not put too much pressure. If you cut the container too short, it cannot be used. For this, cut the container long then adjust the length. 67mm step-up ring can apply to the snack “Chip Star” container’s base.
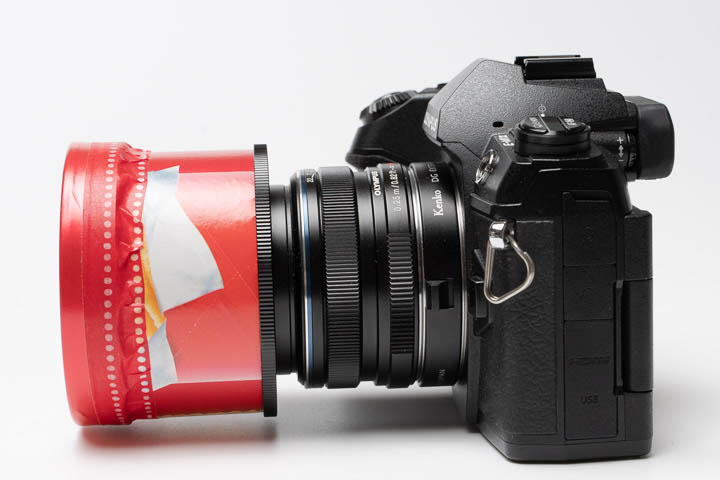
5)Place the parts in the next order. Container’s lid, Soratama, container’s tube part then the step-up ring. Tape the parts for the moment and test shot to see if it is focused correctly and is not vignetted.
6)If you are satisfied with the test shot, fix the lid tightly onto the lens body. If you used the container’s bottom part, the lid will easily fall off. Wrap some paper or a thin sponge around and make sure the lid does not fall off.
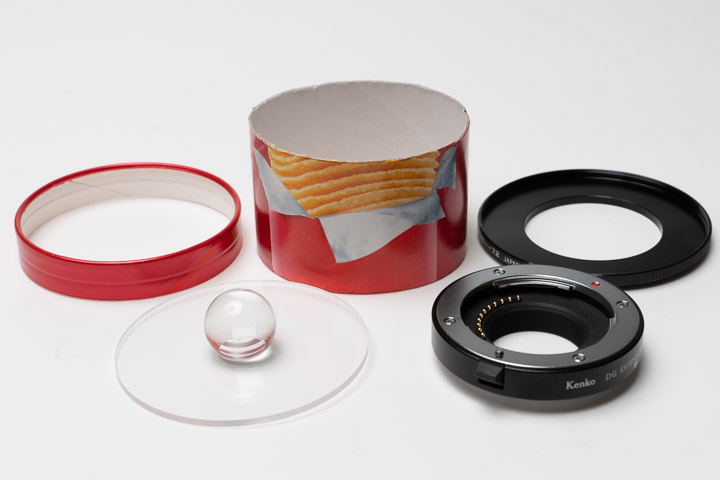
Front row from the left >> soratama, macro extension tube
●About the Close-up Lens
In order to focus on the bulb, it is necessary to take a close-up photo. To make this happen, use equipments such as macro lens, close-up lens and macro extension tube. We used to recommend using close-up lens. However, there are cases where close-up lens causes vignetting. For this, we now recommend using macro extension tube. Of course, if you are able to focus on the object properly and do not have any problems using close-up lens, it is perfectly fine. Please keep using it. Also if you have a macro lens, please try it first. For further details, see the links below:
→How to set Close-up mode
→What is a Macro Extension Tube?
→Using Macro Lens
●Step-up ring
Step-up ring is used to connect the lens and the tube. Adjust diameter of each end to the lens and the tube size. For the tube side, 67mm will fit perfectly. For example, if the lens diameter is 52mm, use the 52→67mm step-up ring.
→Step-up ring and Step-down ring
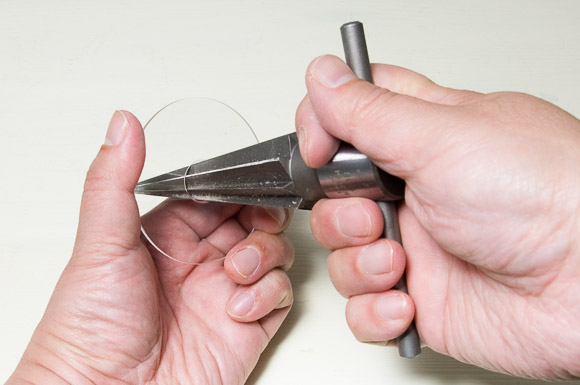
●Make Soratama by yourself
It is possible to make Soratama by yourself using acrylic plate. When drilling a hole on the acrylic plate, screwdriver is very useful. However, there are cases where the plate break apart or get cracks. Please use the drill cutting edge for acrylic objects. Also, reamers are useful to enlarge the hole.
If you are using superglue to bond the bulb, the glue will turn white. Please use glues exclusively for acrylic products.